
Hardhat Tutorial for Beginners
by Alexandra Kropova from Mammoth Interactive
You build a Hardhat project with Solidity smart contracts. You build a front-end for your dApp, like a React site. How do you get the Ether to perform transactions? Answered below.
Want to learn more? Enroll in Hello Coding 4.0. Free in the Mammoth Unlimited Membership. Get 300+ courses and 2,000 hours at a dirt-cheap price.
Step 1. Start Hardhat Network
In your Terminal (Command Line) application:
Use the command below to run Hardhat Network as in stand-alone mode so that external clients can connect to it.
- npx hardhat node
You must keep this Terminal tab open, with the node running. It’s running the Hardhat Network locally on your computer.
Step 2. Run Your Client
- In a new Terminal tab, call ‘npm start’ to run front end of site. This is assuming you have a Node project. If you have a different type of project, then run it/open it up.
Step 3. Connect MetaMask with Hardhat Network
Open your browser with the MetaMask extension. Sign into any MetaMask account (it can be your personal account.)
Add a new network called “Hardhat” at http://127.0.0.1:8545. This must match the port where your Hardhat Network node is running.
Set the chain id to a value like 1337. This must match the chain id you set for the Hardhat Network in hardhat.config.js.
Click on your account icon at the top right of MetaMask. Select ‘Import Account’.
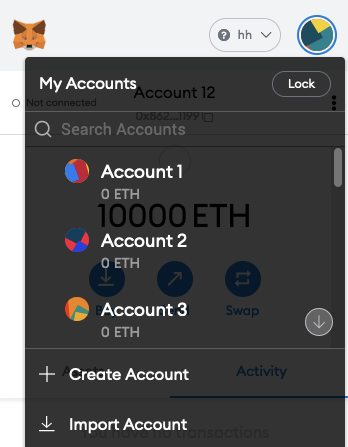
Choose any account from those listed in your Terminal running the Hardhat Network node. This account has 10000 Eth.
Copy the account’s private key, and use the key to import the account into MetaMask.
Warning: These accounts are public. Use them for testing only. Do not send real Ether to these accounts. It will be lost.
You’re done! You will now have an account with Ether, running on the Hardhat Network.
Leave a suggestion or ask a question in the comments below.
Want to learn more? Enroll in Hello Coding 4.0. Free in the Mammoth Unlimited Membership. Get 300+ courses and 2,000 hours at a dirt-cheap price.